DIY Lump of Coal

Leave a comment

coal6+

With Christmas just 4 months away it’s time to start thinking about gift ideas.

We all know someone who deserves this one 😉

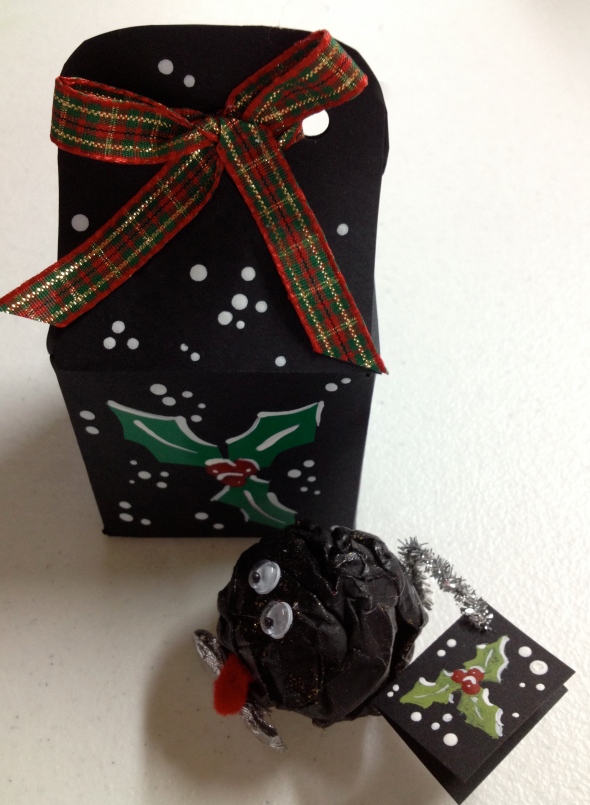
These little fake pieces of coal are fun and easy to make.

Cover a piece of paper with craft glue, scrunch it up and let it dry.

coal1

coal2

coal3

If you’re planning on turning it into a necklace or earrings poke a hole through it using a darning needle then feed your head pin through the hole.  You can do this before or after it’s dry.

coal5

*NOTE* I included links to a few helpful youtube videos below for making jewelry and a cute little gift box.

After the glue is dry, paint it black.  When that dries brush on some gold or silver metallic paint.   Wipe it off while the paint is still wet so you get just a slight sparkle.

If you add too much just go over it again with black paint.  You can also add some glitter if you want more sparkle.

coal4

Snazz it up and wrap it up!!!

coal

make your own gift box  ➸  http://www.youtube.com/watch?v=czNH7kyt7ng

coal7

how to tie an adjustable knot for a necklace  ➸  http://www.youtube.com/watch?v=mnft-ewGbqQ

coal8

how to make earrings  ➸  http://www.youtube.com/watch?v=hl3Y8SkafEc

coal9

Anyway 😉

Upcycled for Easter

4 Comments

EB

So you may have noticed that I haven’t blogged since October.  I’ve changed my mind about blogging about every little I make.   I’ve decided (for now) that I will probably only blog when I feel I have something good and crafty to share with you which is why I am here today.

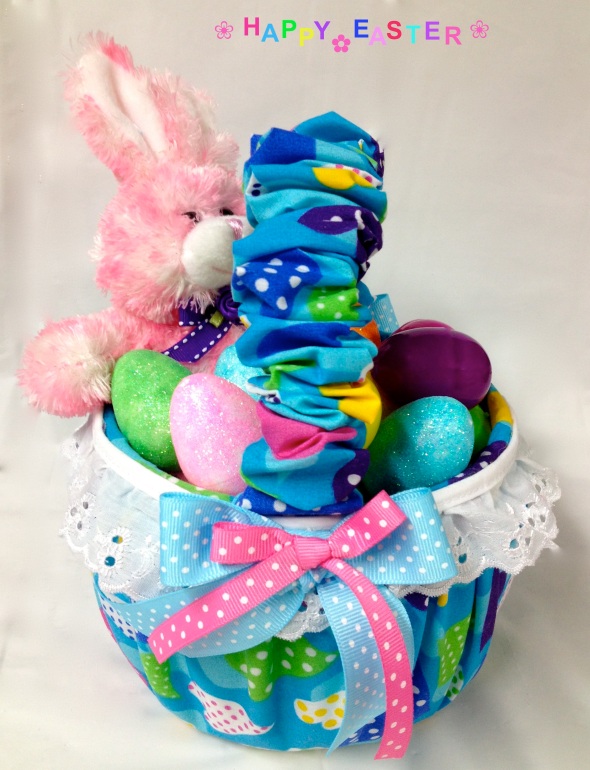
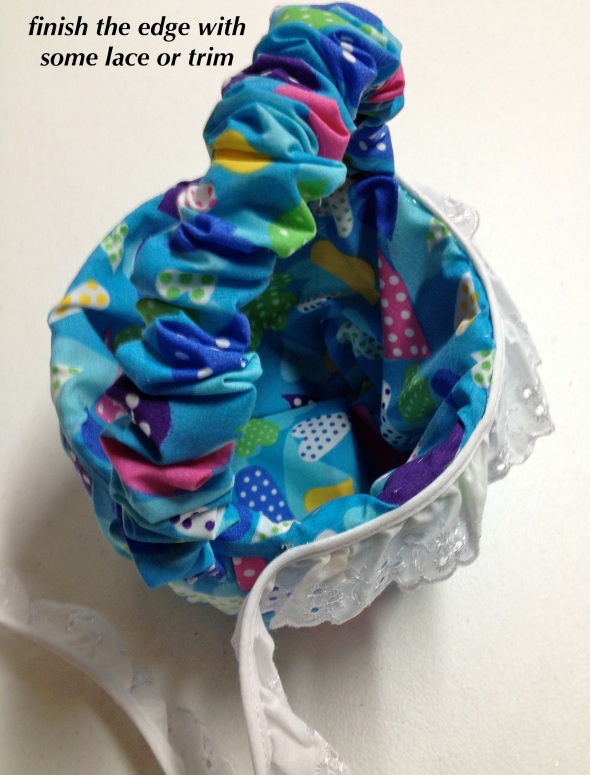
This Easter Basket took me 30 minutes to make.  It’s pretty darn cute and it’s recycling plastic. Cans will work too.  All you need is a glue gun, some quilt batting (optional) and some material and the possibilities are endless.  You can use ice cream, margarine, yogurt, salad containers, coffee cans etc!!!

e-b1

e-b2


e-b4

e-b3

e-b5

e-b6

e-b7

e-b8

e-b9

e-b11

e-b10

add a big bow on the front or two little bows on the handles and you have yourself a cute little basket!

EB

anyway 😉

Fall / Thanksgiving / Baby Shower / Halloween

2 Comments

= busy! Another month over so soon!!! Seems like since I’ve been blogging the months are going even faster.

September was a busy month but not as busy as October is going to be with Thanksgiving next weekend and the baby shower the following weekend.  Needless to say I’ve been hanging out in my cave a wee bit.  Good thing it’s my favourite place to hang out 🙂

I made 60 of these shower favours.  I don’t think there’ll be that many people at the shower but I’d rather have more than not enough.  I was so happy to get them done.  I filled them with candy.  I couldn’t find a variety of candy in blue wrappers so I wrapped alot of them myself in silver paper, overtop of the original candy wrapper. Once I got the knack I was like a candy wrapping machine.  It was pretty monotonous but worth it I think. I’m looking forward to seeing them all on the table at the shower.

**********************************************************************

These were my Etsy orders.

My customer wanted quotes on one side of these bulbs and names on the other.  I wasn’t sure the quotes would fit but they did. It was hard to get a good picture but they turned out really cute.

The rainbow door knocker is something new I added to my shop.

**********************************************************************

This glass block night light was a gift for a sweet little girl on her 1st birthday. I etched the front of the block to give it a frosted look, drilled a hole in the back with my glass drill bit,  added 2 sets of battery operated christmas lights and some strips of tulle inside the block to help keep the lights separated. I added velcro to the back of the light and to the battery packs to hold them on.

**********************************************************************

This weekend I started to get ready for Thanksgiving, Fall and Halloween.

I added some berries to my glasses

and I got my Fall decorating done outside.

My wreath needed a little updating so I sprayed it with some gold glitter and added some varnish spray and then glued the scarecrow on that I took off an old decoration.   He’s cute just sittin’ there chillin’.

I varnished my pumpkins with gloss varnish so they’re nice and shiny and decorated them with some black vinyl words and dots.

I made this fall tree a few years ago.  It was a green tree but a lot of the branches had fallen off so I went to the dollar store and bought a bunch of fall leaf branches, plucked the old green ones off the tree and replaced them with the fall ones.  I picked up some orange lights from Party Packagers and there she is looking like she’s on fire 😉 I love it! A beautiful fall tree that the leaves don’t fall off of 🙂

Anyway 😉

DIY Styrofoam Yard Displays

Leave a comment

Start by sketching on a piece of paper whatever you want to cut out of your styrofoam.

Once you get your pattern done you can either freehand it lightly  or project it onto the styrofoam.

As long as you don’t press too hard while sketching you can cover up any mistakes with a light sanding and paint.

When you’re happy with your pattern cut it out with an exacto knife.  This is easy but messy. After you have it cut out you’ll need to sand the edges with sandpaper to remove all the little loose pieces,  just when you thought it couldn’t get messier 😉

If you’re sweeping, rather than vacuuming it helps to spray a little water on the broom and the floor to help sweep up the all the staticy little pieces of styrofoam.

Now for the fun part… painting!!!  Styrofoam is one of my favourite surfaces to paint on. It’s so easy to blend and float paint on.  I used regular Deco Art paints for mine and they’ve been fine outdoors in wind, rain & snow.

After you’re done painting, glue a piece of wood to the back with an all weather glue, screw a smaller piece of wood to the bottom with a hole drilled in it so you can stake your display in the ground.

You can also add a small screw to the wood near the top.   Then you can tie fishing line to the screw so you can tie the display to a fence or railing for added security from the wind.

Hopefully it’s awhile yet before we see this white stuff!!!

Hello April

2 Comments

Although our winter was not really very cold and we hardly got any snow this year, it always seems like the longest season in Ontario.  April is here and spring is in the air.  The sun is shining, the trees and flowers are blooming and the grass is getting nice and green.  My husband mowed the lawn today and then we gardened all day in our backyard.  It’s a lot of work but it’s fun work and so rewarding when you get to sit, relax and enjoy the beauty!

I was in need of some new outdoor Easter decor this year so I picked up a couple of vases, some easter eggs and some silk flowers from the dollar store. I added some stone to the bottom of the vases for weight then added the eggs and arranged the flowers.   So simple and they look so pretty and colourful sitting on the table on my front porch.

I found this cute wood bunny on an awesome blog I am following  skiptomylou.org.  That was my inspiration for my 3 new little garden bunnies.  I used some scrap plywood and cut out the bunnies and the stakes with my scroll saw.   I glued the stakes on, painted them brown, put a bow on them and planted them in my garden.  They look pretty cute!

Thank-You for the inspiration Cindy. Your bunny looks delicious!!!

HAPPY EASTER